Monday, June 25, 2018

One Pot Spaghetti with a Secret Frugal Ingredient!

You’ll love the blend of herbs and spices in this one, as well as my meaty money-saving tip. 

 Since the beginning of my marriage, a hearty pot of spaghetti has always been my go-to frugal family recipe. As my family has grown, I’ve found ways to adapt favorite meals to accommodate our budget while keeping them filling and delicious. One way I make the money stretch with this meal is by substituting a large portion of the meat with mushrooms. 

Mushrooms are just as filling as meat, have a very similar texture after being cooked, and usually cost a fraction of the price as meat for the same volume. My mom likes to look for Morels in the mountains of Eastern Oregon. Free mushrooms that you found yourself would make this meal even cheaper and more rewarding! 

One Pot Spaghetti 

2 lbs. ground meat (or 1/2-1 lb. meat + 2-3 c. mushrooms) 
2  29 oz. cans tomato sauce 
1 lb. dry spaghetti noodles 
1-2 tsp. each: basil and oregano 
1/2-1 tsp. each: garlic powder, salt, pepper 

Brown your meat in a large skillet or dutch oven. Drain any fat (I use a turkey baster to remove the juices) and add tomato sauce. Fill each sauce can with water and add to the skillet as well. (So two cans of water, two cans of sauce). Break noodles in half and add to the skillet. Season with all or some of the listed seasonings, to taste. Cover and let cook, stirring occasionally, until noodles are soft and sauce is the right consistency. Do make sure to stir, though, so your noodles don’t stick to the bottom. This is our favorite way to make a big batch of spaghetti fast. We serve it with garlic bread and/or salad for a delicious and filling dinner. Let me know if you give it a try!

Sunday, June 24, 2018

Easy Berry Freezer Jam


Our hills are exploding with blackberries! The kids have been gathering them as fast as they ripen and we've started making jams and pies. Yum! Today I thought I'd share my super easy method of making berry freezer jam.  I know this is not the only way to make jam---it might not be the easiest, and it's likely not the healthiest, but it's a great beginner method for those who just want some fresh strawberry jam (or any berry jam!) in their freezer this year!


 You can use any berries for this method.  I'm using strawberries---or "baw-shoos", as my toddler self called them.


Crush the washed and hulled berries with a potato masher or some other smushing tool.  I like the Pampered Chef Mix 'N Chop for this job.  Just don't chop them if you're using strawberries.  I'd read this somewhere before but thought I'd give it a shot just to see if it was true.  It's true.  If you chop the strawberries, they won't release enough juice and your jam won't thicken.


So, after you've crushed the strawberries, measure how much you have and then dump them into a large stock pot.  Mine is 16 qt.  You'll need one fairly bigger than the amount of jam you're making because it will foam up as it boils.  Then measure the same amount of sugar into the pot.  So, today I had 9 cups of crushed strawberries so I added 9 cups of sugar.
Turn the burner up to medium-high and stir until the sugar is dissolved.  Let the mixture boil, stirring occasionally, until the jam sheets off the spoon (as opposed to dripping off).  By the way, they make long-handled wooden spoons for use in large stock pots.  Get one---so you don't burn your hand off.


Pour into a glass or plastic container that has a tight-fitting lid, but let the jam cool in the container before covering.  I use all kinds of different containers for this---they don't have to be specifically made for jam.  You can store glass jars in the freezer---just make sure you cool them all the way first. Store the cooled jam in your freezer for as long as it lasts, or in your fridge for up to 30 days.

Homemade Chicken & Noodles {Chicken & Dumplings} --- Frugal Family Recipe

There are a few things that will always remind me of Leo Coller. One of them is homemade chicken noodle soup. My husband has always raved about his dad's homemade chicken and noodles and it doesn't matter how many variations I come up with, I never have made it, "just like Dad's". Still, this recipe gets lots of compliments around our table, even from Jamie, so I suppose I'll have to just let his Dad be the chicken noodle king and I'll live happily in his shadow!

Before I give you my recipe, here are a few tips concerning the preparation of this delicious comfort food:

The process of making this homemade soup is actually very simple, but the fact that it's all homemade makes me feel all Ma Ingalls-ish. It's a great low-cost recipe that feeds a large family. I suggest grabbing several of these whole chickens when you find them on sale and just storing them in the freezer. Sometimes you can get them for as low as .60 a pound---which would make your whole meal cost less than $5 for about 12-15 servings.

Do you have a pastry blender? I suggest purchasing one. I use mine all the time for biscuits and other easy bread recipes. Any time a recipe says "cut in butter using two knives", use a pastry blender instead. You'll save time and serious annoyance. {I'd love to hear from someone who has successfully turned this mixture to "pea-sized crumbs" using two knives. I've got to know your trick!}

I never worry about cutting uniform noodles. I just roll out the dough to about 1/4" and cut through it quickly with a pizza cutter. Super easy!

De-boning the whole chicken will give you enough meat for 12-15 servings. Some people only use white meat in their chicken noodle soup, but I say, "bring on the dark meat!" If you really must only use white meat, stick the rest of the bird in a large freezer bag and store it for making homemade chicken stock or broth later on.

Here's my recipe for Homemade Chicken & Noodles. Let me know if you give it a try!

Homemade Chicken & Noodles

1 whole chicken
3 1/4 c. flour
2 tsp. salt
6 TB butter
3 TB chicken bouillon 
2 c. milk

salt and pepper, to taste 

Put the chicken in a large stock pot and cover completely with water. Bring to a boil, then continue cooking chicken for one hour, or until cooked through. I like to turn it over now and then, and poke it with a fork to make sure it's getting done all the way through. When cooked, remove the chicken to a platter to cool.

While chicken is cooking, make the noodles. Start with 2 c. of flour in the bowl. Add 2 tsp. salt and 4 TB of butter. Use a pastry blender to mix it up until it's the size of small peas. Add 1 cup HOT water and and 1 1/4 c. of flour to the mixture. Stir and work the mixture until a soft dough ball forms then break off about a third and roll it out to about 1/4" on a floured surface. Cut the dough into strips using a pizza cutter. If the chicken is done at this point, remove the chicken and begin adding the noodles, one at a time, to the still boiling water. If the chicken is still cooking, layer the noodles on wax paper and continue rolling them out. They'll be fine on the counter for awhile until the chicken is done.

Before adding the noodles to the pot, add the bouillon and salt and pepper to taste. Then, drop the noodles, one at a time, into the boiling water. Add 2 TB butter and continue cooking. Whenever the chicken is done, add it in, too. Continue cooking until noodles have been boiling for at least 15 minutes. Then, add the milk, turn off the burner, cover the pot, and let it sit for about 1 hour. {Don't forget to taste the broth before serving to make sure it's just right!}

Friday, June 22, 2018

Homemade Chicken Stock and Broth

So what's the difference between stock and broth? Aren't they interchangeable? No. It's all about the seasoning. Stock is what you get from simmering the scraps of the meat, along with any vegetables you throw in. Broth is made when you add herbs and spices to season the stock.

Much of my cooking the last few years has involved various forms of soups and stews. When you've got a good broth base, a little bit of food can stretch a long way in a hearty soup. At first, I'd buy cans of broth---but when I was buying eight or more cans per meal, storage became an issue. Then I switched to bouillon cubes or granules---but the additives made me nervous and I had little control over the flavor. Last year, I started making my own stock and found it to be the least expensive, most flavorful, and healthiest option I'd tried. In fact, I spend just pennies every time I make a huge stock pot full, as I use scraps* that I've saved in the freezer.

Homemade Chicken Stock
Chicken, Vegetable, & Herb Scraps (frozen or thawed---doesn't matter)
3-4 bay leaves
splash of vinegar
water
large stock pot

Making your own stock is so simple that I feel a little silly writing this out. Still, it's something I didn't start doing until my mid-30s so I've got to assume this information will be valuable! So basically, just put your chicken, veggie & herb scraps, splash of vinegar (to draw out more nutrients from the chicken carcass) and bay leaves in the pot and fill it with water within 3 or 4 inches from the top. You don't have to cut anything up---just put it in there frozen, if you'd like. Put the pot on a back burner to boil. Once you've got a good boil going, turn it down to simmer and leave it for several hours. You'll know it's done when you've lost a few inches of water and the water has turned a beautiful golden color.

I use two straining methods to remove the scraps from the broth. I use my vegetable colander for the first straining, gently pouring the stock, a little at a time, through the colander and into a roasting pan. I throw the scraps away at this point, and then I clean out the stock pot and pour the mixture back into it---this time using a fine mesh sieve to get out the smaller stuff.

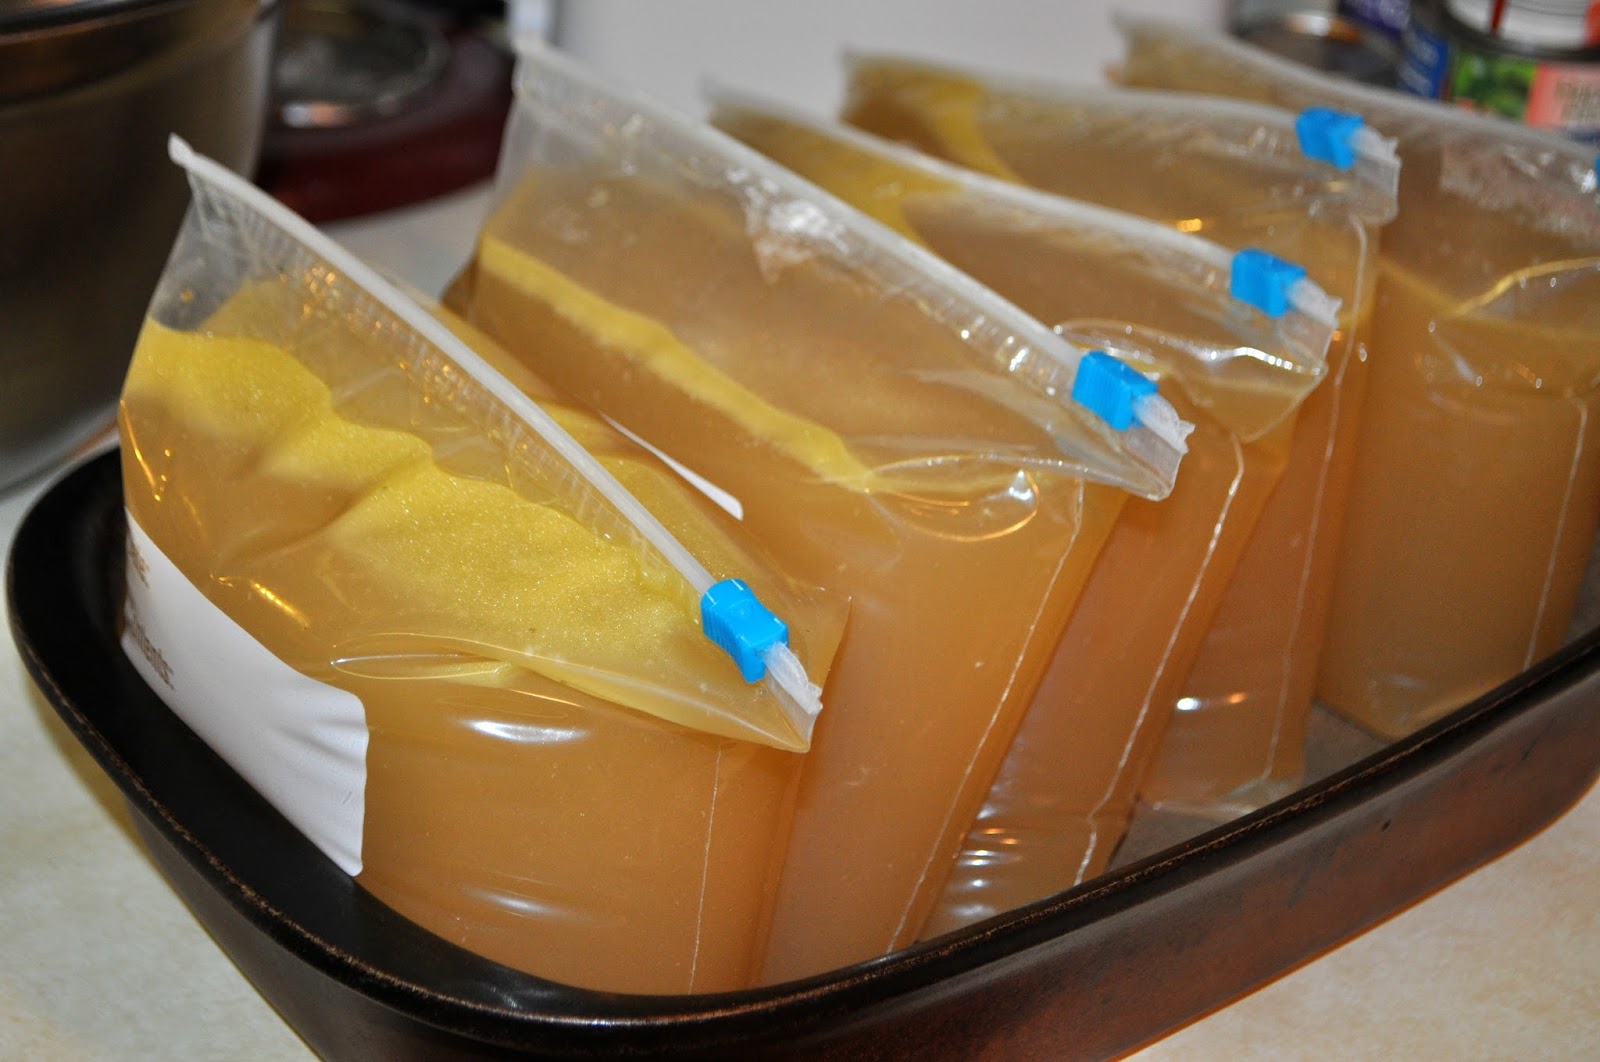
Now you can bag it in quart size bags and freeze, or preserve it in jars with a pressure canner. I'm thinking I'll start saving plastic food containers to reuse, but for now I use quart size bags. I usually get 5-6 quarts of stock each time I make this. I stand them up inside a baking pan and let them freeze, then I retrieve my baking pan and I'm good to go.

Using the stock is simple...just remember to thaw first!

When you're ready to use it as a broth base, add your own blend of seasonings. Some that we love include: salt, pepper, bay leaves, garlic, thyme, basil, and marjoram. I don't add any extra salt or seasonings when I'm making the stock because I don't always know what I'm going to use it for. This also helps me not over-salt the soup as I don't have to remember whether or not I salted each batch.

*A note on scraps:

Chicken: Oftentimes, I pick up a rotisserie chicken from Walmart to use in chicken taco salad or our favorite creamy chicken soup. If I go during the right time of day, I can get one from the day before at half price (about $2.50). I save the bones and skin from these in the freezer in a gallon-size freezer bag until I have saved up enough vegetable scraps to make the broth. Of course, you can always just pick up some fresh chicken on sale---but be sure to buy it bone-in and boil for awhile to get all the important nutrients out of the bones.

Vegetables: We always have a simple vegetable tray made up to serve with lunches. Usually just carrots and celery, with a separate bowl of cucumbers. When the carrots and celery start to dry out or turn a little brown at the edges, I put them in the freezer bag with the chicken bones. Onion scraps often come from leftovers on hamburger night (tomatoes, too) or from the other half of the onion when a recipe only calls for a small bit (this is becoming rarer---ha!).

Herbs: use stems and "less fresh" herbs from your garden.

Once you get in the habit of saving scraps, you'll find that there are actually lots of things you'd normally throw away that can be saved for a soup base or even a casserole.